This series covers the basics in getting started in various technologies and focuses on the very first steps needed to start learning about each one. Each article is roughly a five minute read with an introduction
to the topic and a step-by-step guide to your first experiences with the technology in question.
What is it?
Like HTML, Markdown is a text-based notation used to format documents. Markdown is very lightweight, with a limited set of formatting tags, and is quick to pick up, but can
be very powerful. For example, the content for this website (IT Should Just Work) is primarily written using Markdown, which is then processed into HTML by a piece of software called Hugo.
Markdown is also a very useful tool when writing IT documentation, it’s simplicity makes it easy to both write and then import into another format or platform later on. The default README’s in most git repositories (GitHub, Azure DevOps etc) will be rendered from Markdown files, and the formatting notations work directly on documentation platforms like Atlassian Confluence.
What tools do I need?
Whilst any text editor will allow you to write in Markdown, a great way to start is to use Visual Studio Code. This software is free, and will enable you to both edit and render Markdown files.
Alternatively, you can run Visual Studio Code directly in your web browser, and we’ll use that in these examples.
Let’s Get Started!
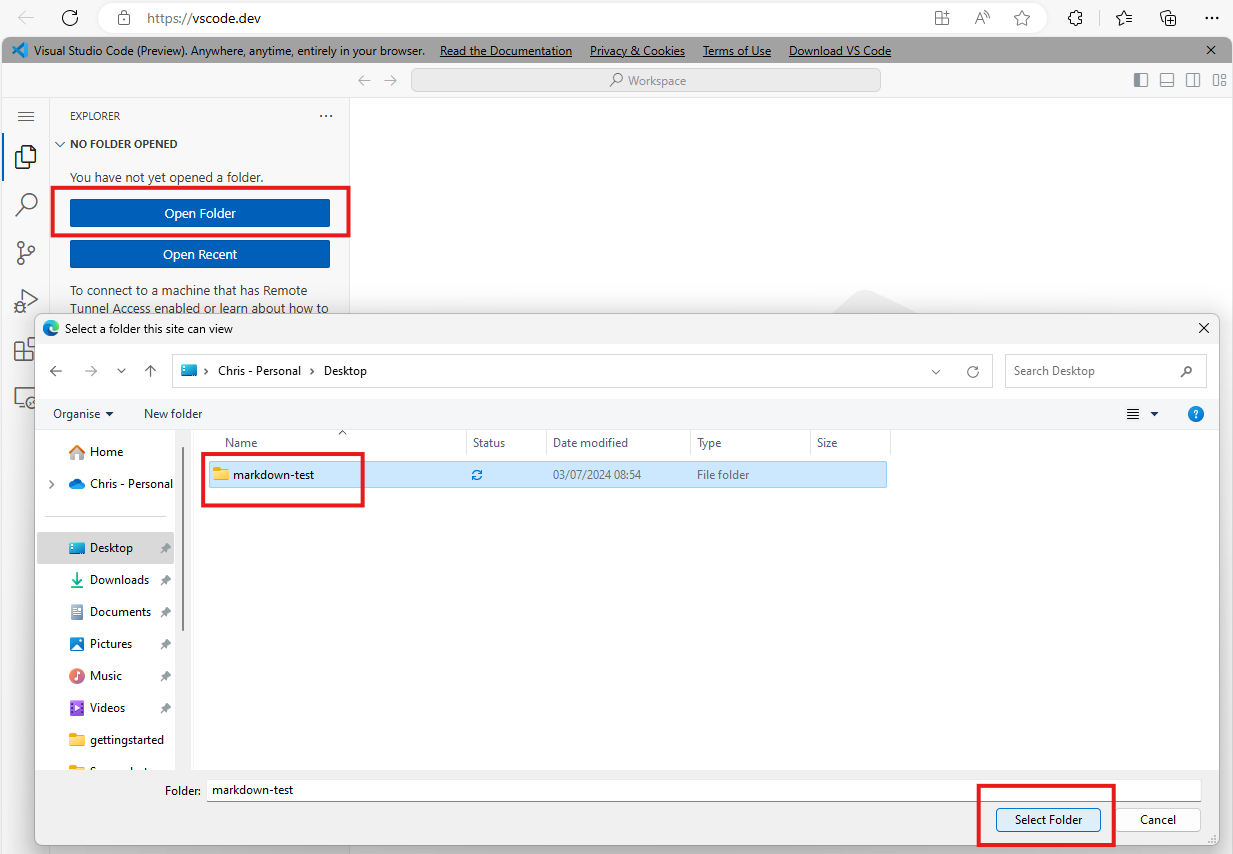
Visit https://vscode.dev in your browser to open Visual Studio Code. Click the “Open Folder” button and select (or create) a folder to put your files in.
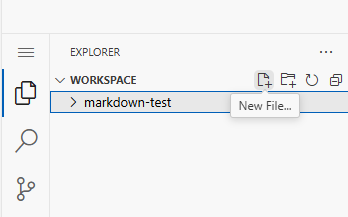
Click on the selected folder under WORKSPACE and click on the New File button. Call your new file myfile.md - the .md denotes this is a Markdown file.
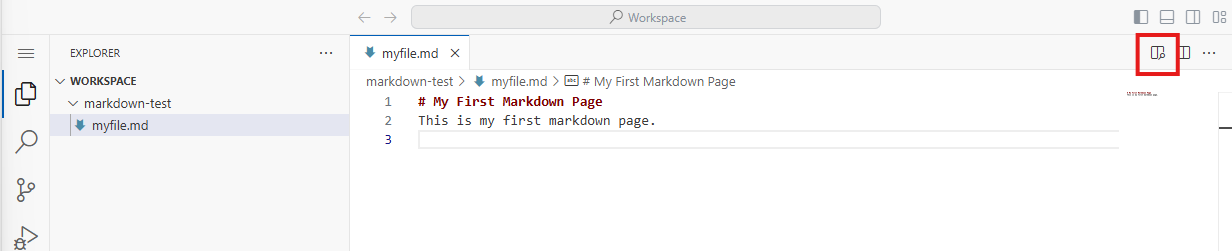
Copy the following text into your new file:
1# My First Markdown Page
2This is my first markdown page.
Click on the Open Preview to the Side button to see what this the output looks like.
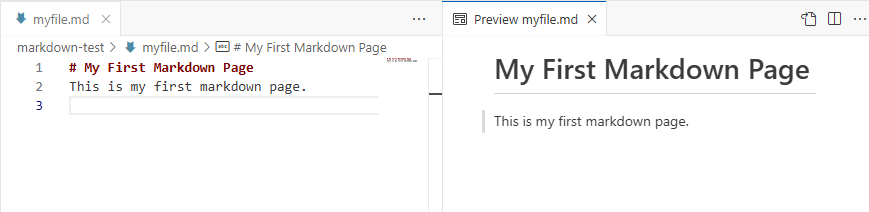
You should see a top-level heading “My First Markdown Page” followed by some normal text “This is my first markdown page.”
Headings and Paragraphs
The # hash symbol followed by a space at the beginning of thr first line of our example indicates the following text is a heading. The number of hashes shows the level of that heading, with 1 being the largest. For example
Normal paragraphs are just entered on their own line(s) with no embellishments. Leaving a blank line indicates a paragraph break. For example:
1This is
2paragraph one
34This is paragraph two
More Formatting
There are many more codes to use to format Markdown documents, here’s some of the more common:
Description
Example
Link
[Text to Display](URL or relative path to link to) [IT Should Just Work](https://isjw.uk) IT Should Just Work
Image
 
Bold Text
This is **bold** text This is bold text
Italic Text
This is *italicised* text This is italicised text
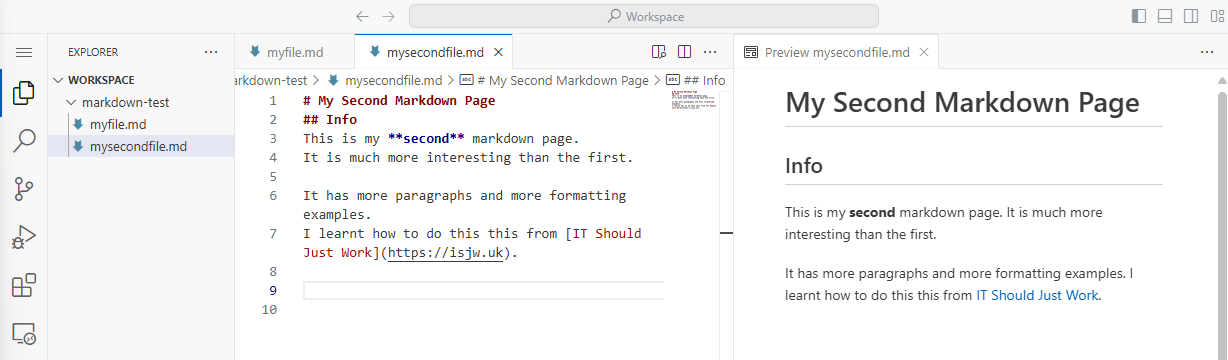
Let’s use some of these notations into a second page. Create a new .md file in Visual Studio Code and copy in the following text.
1# My Second Markdown Page
2## Info
3This is my **second** markdown page.
4It is much more interesting than the first.
56It has more paragraphs and more formatting examples.
7I learnt how to do this this from [IT Should Just Work](https://isjw.uk).
If you use the preview on this new file it should look something like this, with subheadings, paragraphs, and links included:
Want to learn more?
In this getting started article we’ve learnt what Markdown is, and how to create and view a very simple document in this markup language using Visual Studio Code.
Here’s a few suggested websites where you can find out more on this topic: