Getting Started With.... Git
Overview
Note
This series covers the basics in getting started in various technologies and focuses on the very first steps needed to start learning about each one. Each article is roughly a five minute read with an introduction to the topic and a step-by-step guide to your first experiences with the technology in question.
What is it?
Git is a version control system used primarily for managing code. It enables you to work on a project individually, or with others, and keep track of multiple versions of your code and different threads (branches) of development. Git is the open-source system behind popular products like GitHub, GitLab, Bitbucket, and Azure DevOps, but can also be used on it’s own. In this introduction we’ll start by looking at using Git independently.
What tools do I need?
You’ll need to install Git on your local machine. This can be downloaded from git-scm.com. The easiest way on a Windows computer is to install using winget:
1winget install --id Git.Git -e --source winget
Let’s Get Started!
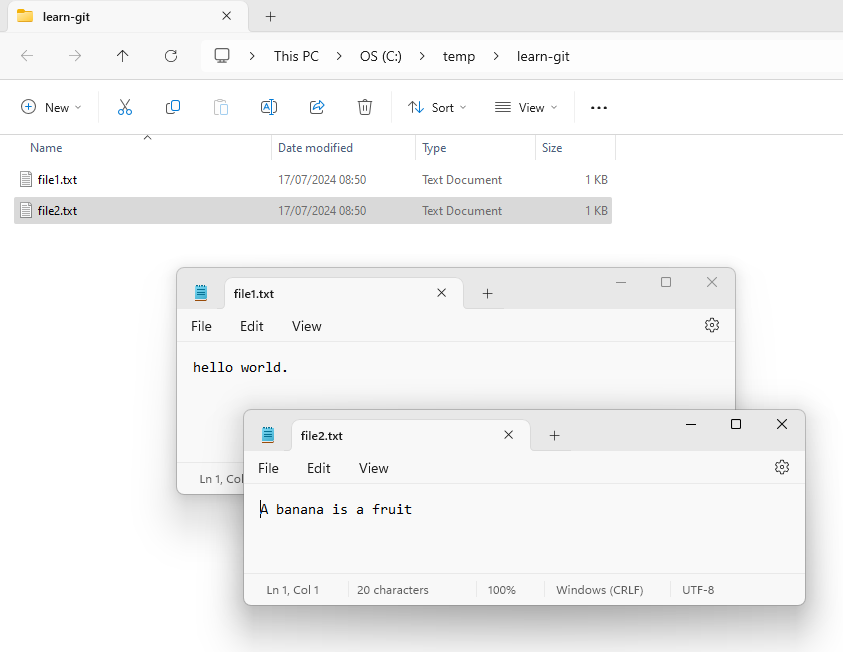
To start off create an empty folder to hold your new “code”. We’re going to use simple text files in this example, so there’s no need to know any particular coding languages. The following script will create a folder called learn-git and two text files file1.txt and file2.txt within it. Both these files contain some text. You can run this, or do the same using Notepad or another text editor.
1mkdir "learn-git"
2cd "learn-git"
3echo "hello world." > file1.txt
4echo "A banana is a fruit" > file2.txt
Here’s an example of what that would look like if you open the folder and files in Windows.
Before using git for the first time you will need to configure a username and email- these are used to record who made the changes in you repository. Configure your own details like this:
1git config --global user.name "John Smith"
2git config --global user.email "john.smith@example.com"
Now we have git setup and a location for our repository it’s time to configure that repository for git. To do this we use the git init command to convert this existing folder into a git repository. From within the new learn-git folder created above run
1git init
This creates a hidden folder called .git which contains the config files and versioning for our repository.
An important concept in git version control is the idea of commits. After we’ve edited some code we need to run a git add to tell git we want to include this changed file in the next snapshot (this is called staging) and then git commit command to take a snapshot for the change history. In our example, let’s change file1.txt and commit that change.
1echo "how are you today?" >> file1.txt
2git add file1.txt
3git add file2.txt
4git commit -m "added some text to file1.txt"
You will see that we added a message to our commit. This description helps us later when we look at the change history of our repository.
We can make a second addition to that file, let’s add some nonsense.
1echo "rgfgfisdbdef8y9ikdksk" >> file1.txt
2git add file1.txt
3git commit -m "added some rubbish to file1.txt"
Looking at the file we can now see it’s got junk in the last line:
1hello world.
2how are you today?
3rgfgfisdbdef8y9ikdksk
So how can we switch back to the point in the history before the gibberish was added to file1.txt? This is done by using the git revert command. First we need to find the identity of the commit we want to revert.
1git log --graph --decorate --oneline
2
3* 6c3c3b6 (HEAD -> master) added some rubbish to file1.txt
4* 029a13c added some text to file1.txt
We can see the two commits we have made here- be aware that in your examples the two identifiers 6c3c3b6 and 029a13c will be different. We want to revert the top commit, so we give that identifier to git revert as follows:
1git revert 6c3c3b6
An editor window then appears for us to add a commit message in, just save and exit (Shift + ZZ). Now if we look at our file we can see that the gibberish has gone.
1hello world.
2how are you today?
A second important concept in git is Branches. Branches allow you to have several different active pieces of work happening at the same time in the same repository, and even by different people. If we consider our example
we might have a project to update file1.txt going on at the same time as a project to update file2.txt. Here’s what that might look like with two branches being created and merged back in:
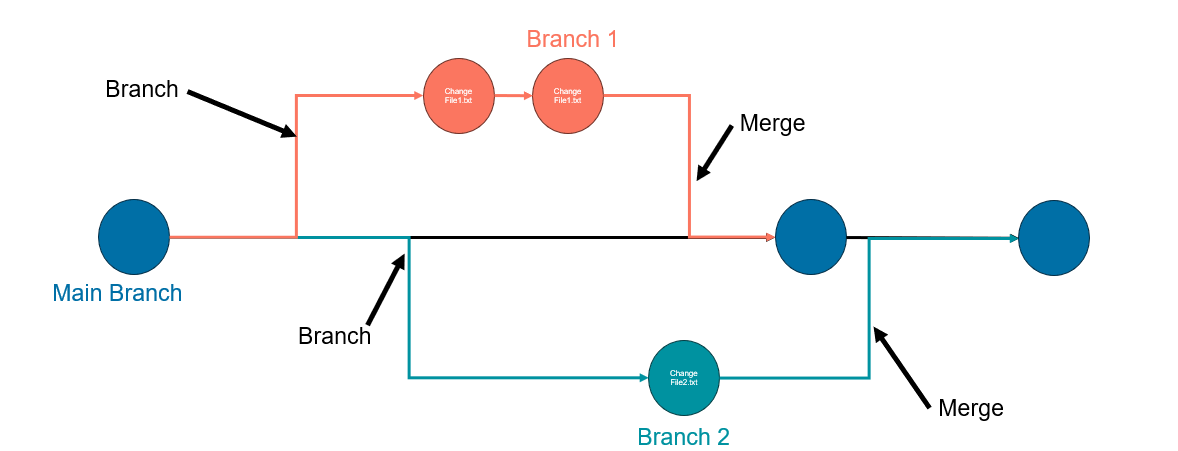
Branch 1 in this example can be created using git branch and giving the branch a name:
1git branch "branch-1"
2git switch "branch-1"
We can make a couple of changes to file1.txt, and commit them as we go.
1echo "It is a sunny day. " >> file1.txt
2git add file1.txt
3git commit -m "added some more text to file1.txt"
4echo "But it might rain tomorrow. " >> file1.txt
5git add file1.txt
6git commit -m "added some final text to file1.txt"
file1.txt now looks like this:
1hello world.
2how are you today?
3It is a sunny day.
4But it might rain tomorrow.
These commits have been added to the branch-1 branch, and the original branch is unaffected. We can switch back to the master/main branch and look at file1.txt:
1git switch "master"
And when we look at file1, it only contains those first two lines. Our extra additions are still preserved in the branch-1 branch though.
Let’s build that second branch from the diagram above.
1git branch "branch-2"
2git switch "branch-2"
3echo "An apple is a fruit " > file2.txt
4git add file2.txt
5git commit -m "changed the fruit in file2.txt"
If we hopped between branches with git switch now we would see the following:
| Branch | file1.txt contents | file2.txt contents |
|---|---|---|
| master | hello world. how are you today? |
A banana is a fruit |
| branch-1 | hello world. how are you today? It is a sunny day. But it might rain tomorrow. |
A banana is a fruit |
| branch-2 | hello world. how are you today? |
An apple is a fruit |
Now work is finished on these branches we can merge them back in as follows. Branch 1 first
1git switch "master"
2git merge "branch-1"
With branch 1 merged in, our table looks like this:
| Branch | file1.txt contents | file2.txt contents |
|---|---|---|
| master | hello world. how are you today? It is a sunny day. But it might rain tomorrow. |
A banana is a fruit |
| branch-1 | hello world. how are you today? It is a sunny day. But it might rain tomorrow. |
A banana is a fruit |
| branch-2 | hello world. how are you today? |
An apple is a fruit |
And finally we will merge in Branch 2:
1git merge "branch-2"
And the results are as follows, with the changes from both branches incorporated into the state of the main/master branch.
| Branch | file1.txt contents | file2.txt contents |
|---|---|---|
| master | hello world. how are you today? It is a sunny day. But it might rain tomorrow. |
An apple is a fruit |
| branch-1 | hello world. how are you today? It is a sunny day. But it might rain tomorrow. |
A banana is a fruit |
| branch-2 | hello world. how are you today? |
An apple is a fruit |
This all works very well locally, but the real power of git is found when you use a centralised repository like GitHub or Azure DevOps. With a remote configured you can push your local committed changes up to that online repository and
pull any changes back down from that location. I won’t delve into that in this particular article, but check out the links below for information on how to get setup with a remote repository.
Want to learn more?
In this getting started article we’ve learnt what Git is, and how to use it for some basic version control activities.
Here’s a few suggested websites where you can find out more on this topic: